Disbursement Codes
Guide Overview
Disbursement codes can be set up by disbursement type. These become frequently used disbursement templates which can be selected from on the disbursement creation screen. The disbursement type, description, amount and supplier (where relevant) will automatically populate. This guide will take you through the process of creating these Disbursement Codes
Creating Disbursement Codes
1. Click on the Settings drop-down menu on the main Navigation bar and select Firm Settings

2. Select Disbursement Codes from the list of options in the Accounting menu.

3. Click on Add Disbursement Code on the top right corner of the screen to add.

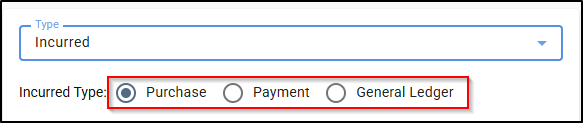
4. Choose a disbursement type from the Type dropdown menu.

5. If an Incurred disbursement is selected, you will be able to choose from a purchase, payment or General ledger disbursement type.
6. Type in a name and code for the disbursement in the respective fields.

7. In the case of a cost recovery, an additional Tag field will be available. Since Cost Recovery is a revenue account, the tag can be used to segment the cost recovery in the profit and loss by type. A tag can be assigned to a cost recovery as follows:
a. Click inside the Tag field.
b. Type in the name of the tag and click on the New button that appears.
c. The cost recovery tag will then be complete.
d. Type in a rate for the cost recovery or amount for a disbursement and select a tax code in the respective fields.

e. Type in a description in the Description field.

f. In the case of an anticipated disbursement, incurred purchase disbursement, an additional Supplier field will be available. Click inside the Supplier field and start typing the Supplier's name to select it from the directory.

g. If an entity is not found in the list, a new one will need to be created by click on the New button that appears below the search bar.

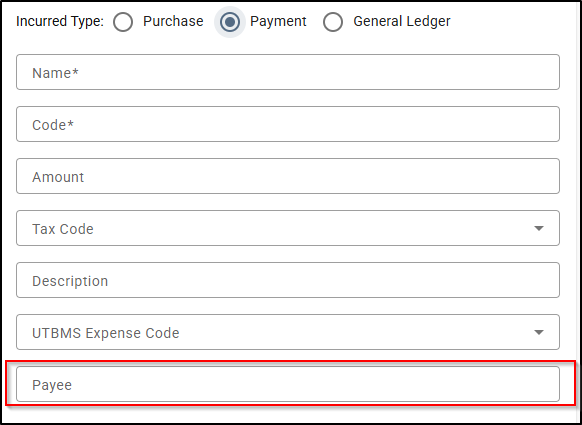
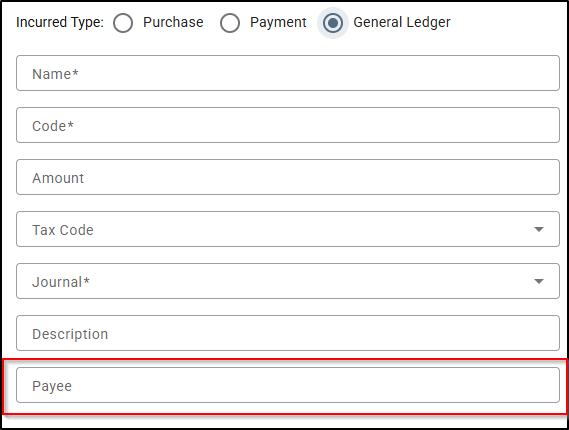
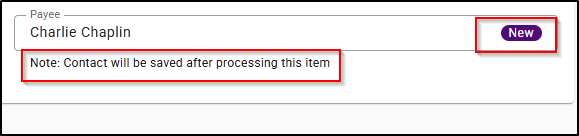
h. In the case of an incurred payment and general ledger disbursement, an additional Payee field will be available. Click inside the Payee field and start typing the entity's name to select it from the directory.
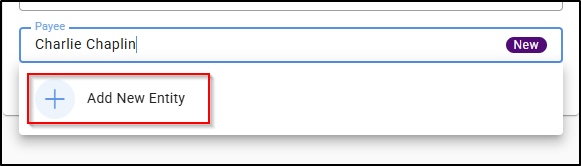
i. If an entity is not found in the list, a new one will need to be created by click on the Add New Entity button that appears below the search bar.
You can skip this part by clicking on Tab on your keyboard, a contact will be saved after the item is processed and you can go back to Directory and add details to that contact and create the entity later.
Click Save at the bottom of the screen.
