Saving and Scheduling Custom Reports
Reports can be scheduled to be sent out automatically. Follow these steps to schedule your custom reports:
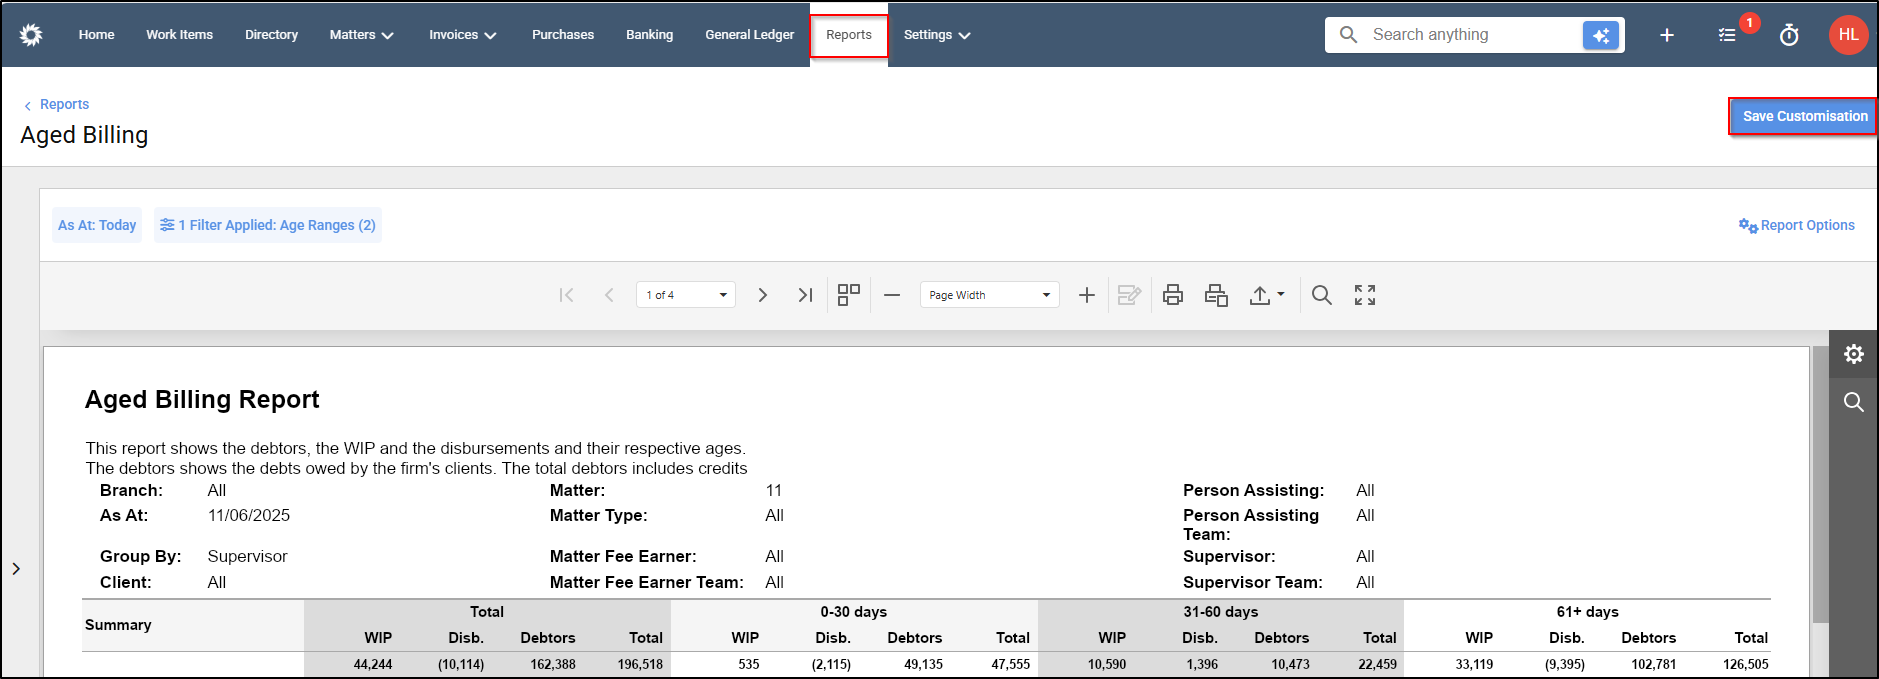
1. Go to the report you wish to run, amend any columns or filters and click on the "save customisation button".
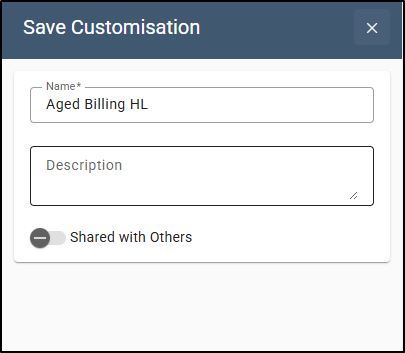
2. Enter a name and description and decide whether to make the report visible to other users using the "Share with others" button. Click Save
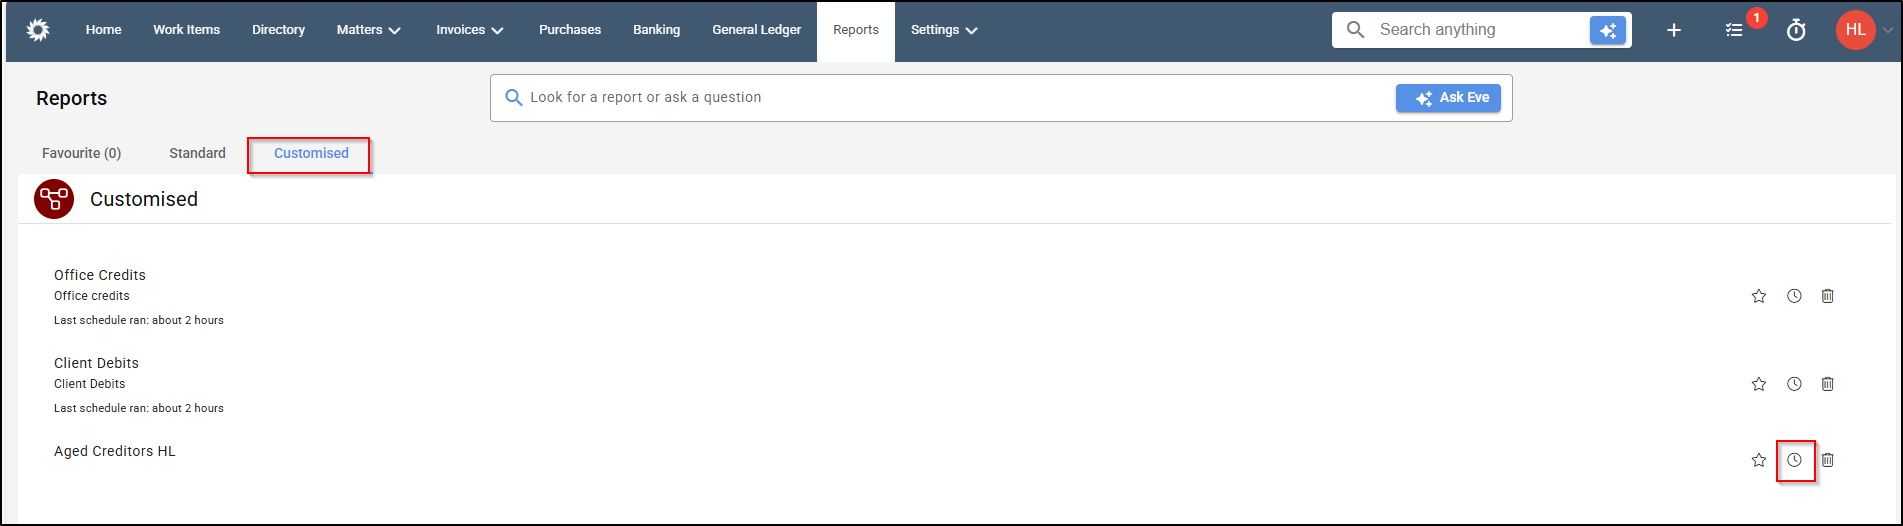
3. From Reports > Customised > and click the Clock icon on the report you saved.
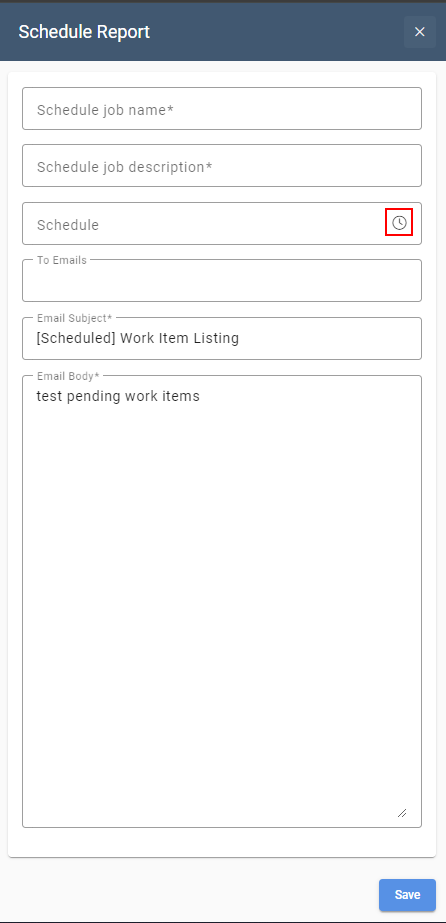
4. Enter a name and description for the scheduled job, the email address you wish to send it to as well as the subject and content of the email. You can also click on the clock icon in the schedule field and select the dates and times you wish the report to be sent out.
Note: You can adjust how long an email remains in quarantine before it is sent out by navigating to Settings > Firm Settings > Message Quarantine Configuration and updating the value. (The duration is set in hours.)
