Supplier Verification
Overview
A supplier verification step will segregate the duties of recording data and verifying financial information such as supplier banking details between Support Staff and the accounting team.
Upon creation of a new Supplier and entry of the Banking information, the Supplier will remain in a state of ‘Unverified’. In order for the Supplier to become verified, a member of the Accounts team (or authorised personnel), will be required to review the Supplier details. The Accounts team (or authorised personnel) will receive a warning if they attempt make a payment to an unverified supplier.
If a Supplier’s Banking information is updated the Supplier will once again enter a status of ‘Unverified’, requiring the verification of the Accounts Team (or authorised personnel) again.
How to verify a new Supplier
1. A new supplier can be created via the Directory or from within a transaction screen. See Guide 'Create and Manage Suppliers' for further instructions on creating suppliers. 
2. Once created, a new Entity will have a status of Active. This can be seen from the supplier screen accessed via the Directory or when creating a payment to the supplier. There will be no green check mark against the supplier until the supplier is verified.

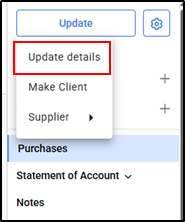
3. In order to verify the Supplier bank details, a member of the Accounts team (or authorised personnel) will need to navigate to the supplier from the Directory to perform the below steps. Select Update details.
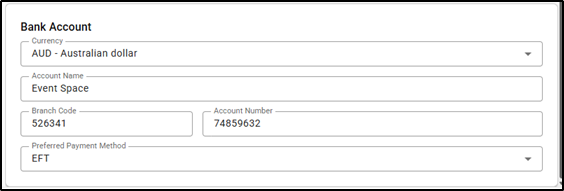
4. Update the Supplier's Bank Account Details, then select Save.
5. then from right hand menu, select Verify Entity.
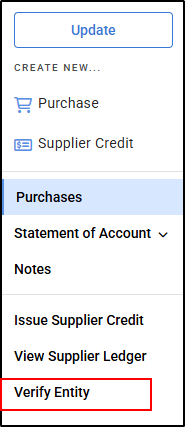
6. Once this is selected, a confirmation pop- up will appear in the centre of your screen.

and a green check mark will appear in the directory to show the supplier is verified.
