Move Time Entries in Bulk
Overview
Multiple Time Entries can be transferred from one matter to another in a single process.
How to move Time Entries
1. Navigate to the Time tab via the top menu.

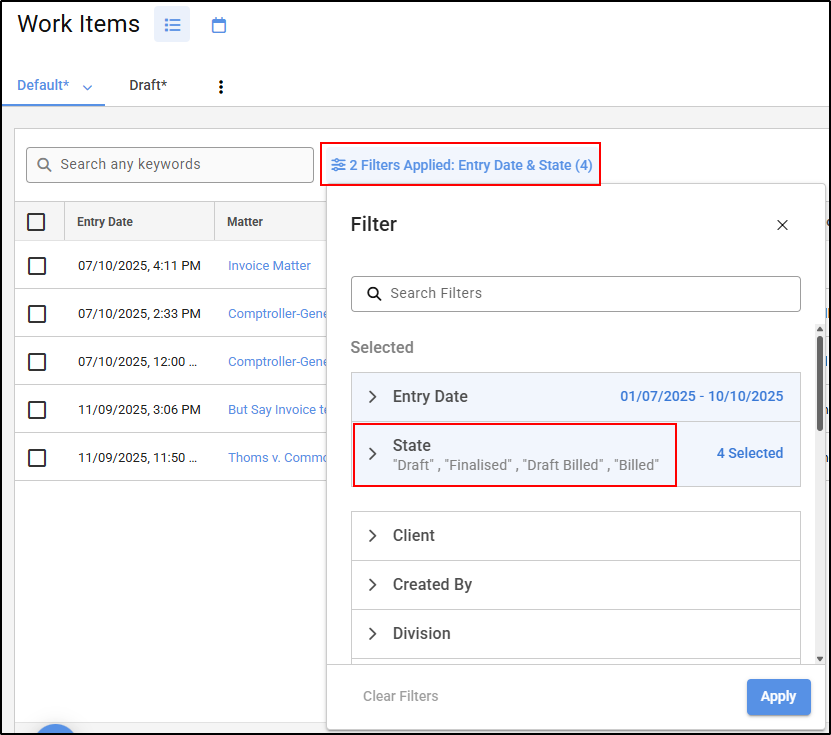
2. Apply the relevant filters to the time entries listing, this includes adding the 'State' filter which allows you to view the billing status of the time entries. Only Pending, Finalised or Non-billable entries can be moved to another matter.
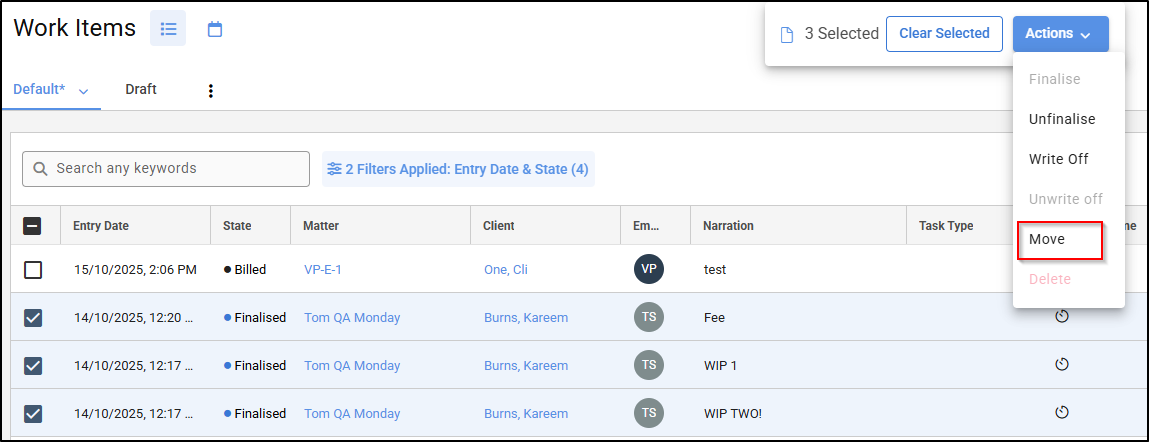
3. Select the time entries that you wish to be moved from one matter to another matter. To do so, click on the tick box located on the left of the time entries.

4. Once you selected the time entries to be moved, click Action and then Move located at the top of the screen.
5. The Time entries window will appear.

6. Enter the matter number you wish to have your time item/s moved to. Then click Confirm.

7. Your time items have now been successfully moved to the nominated matter.
Note: If you need to move a time entry which is included in a draft bill , the item must first be removed from the draft invoice that it has been included on.
Audit trail of moved time entries
Once a time entry has been moved from one matter to another matter, an audit trail will be logged within each matter affected. To view this, navigate to the matter and click the Settings Cog in the top right corner and select Recent Activity.

The Recent Activity of the matter the time entries have been moved From will show the time entry was Unfinalised and Moved.
On the Matter where the time entry has been moved To, it will display as Moved and then Finalised.
