Create, Edit and Write Off Time Entries
Overview
This Guide covers how to record, edit and write off time entries.
Create Time Entry
There are 2 ways to record time entries:
1. From the Time tab in the Navigation Menu.
2. From Time Entry+ in the matter screen then New Time Entry.
From Time tab in the Navigation Menu

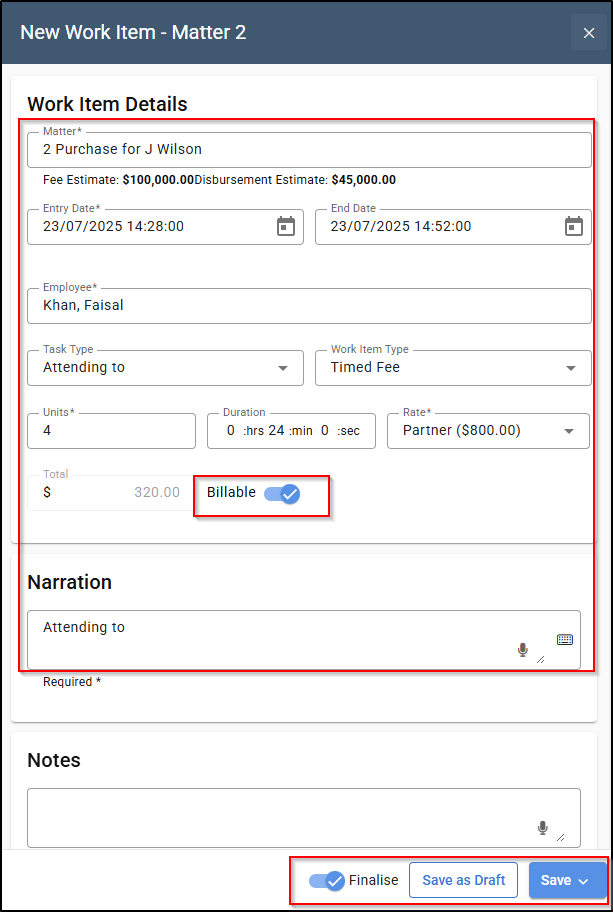
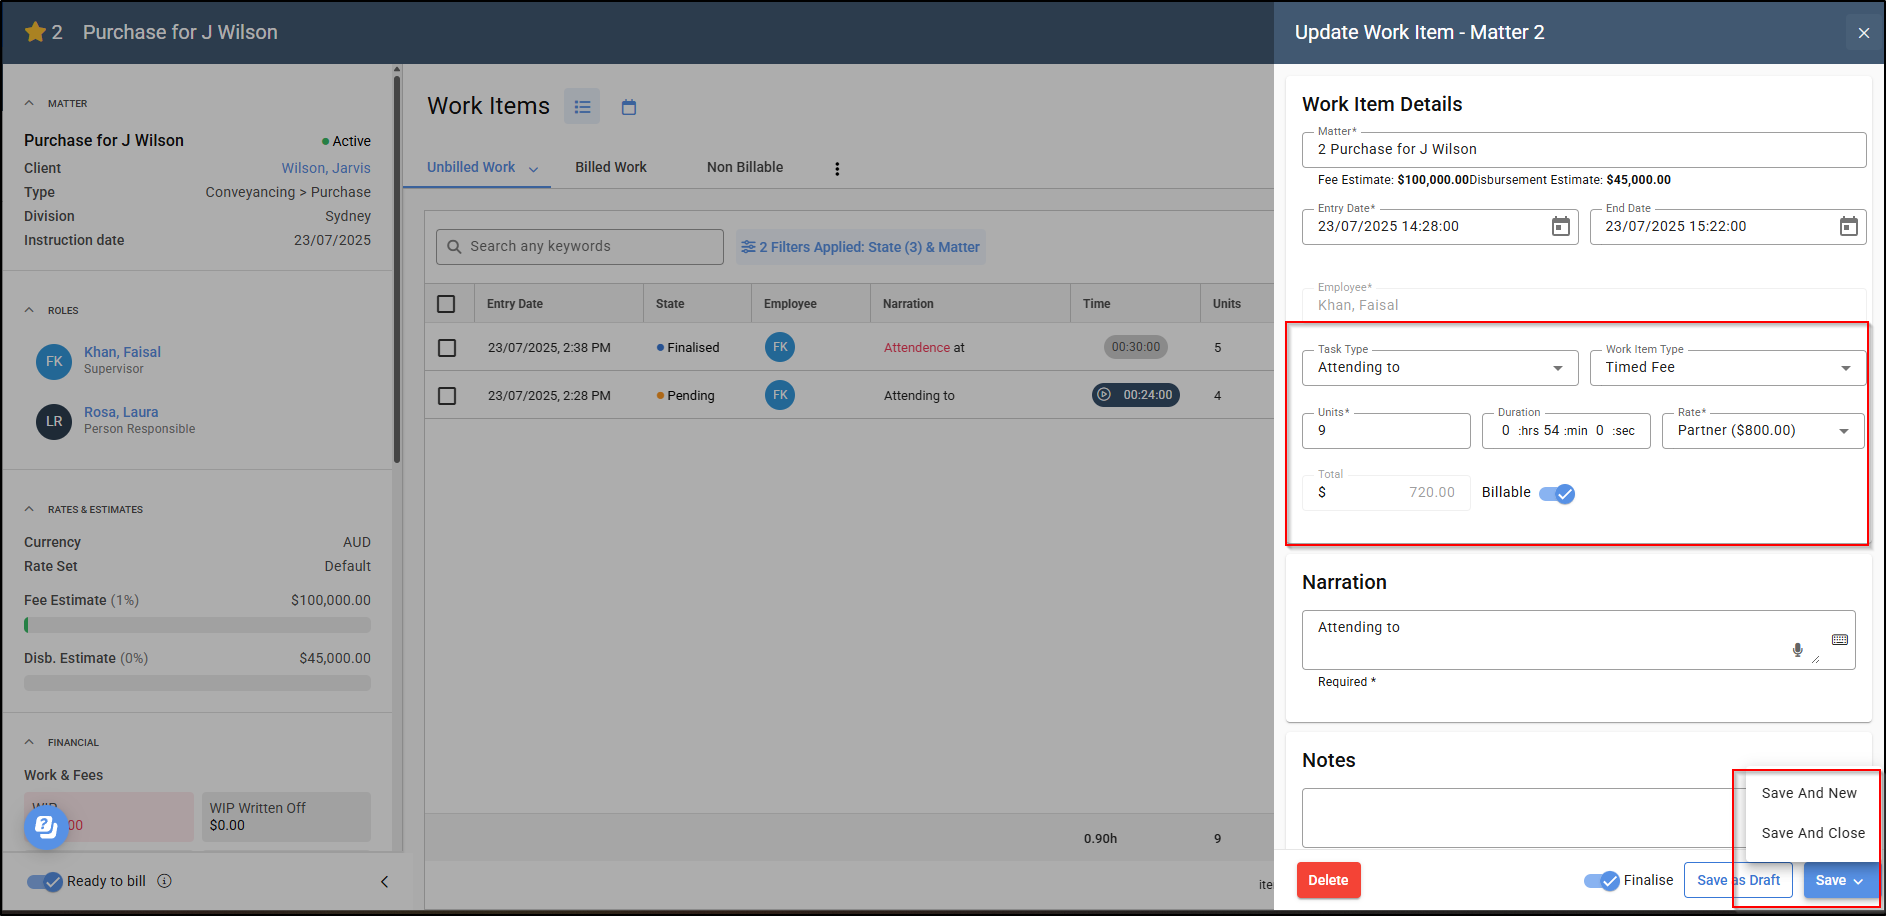
2. On the next screen, enter the matter number and adjust the date if needed. Select an activity from the drop-down menu, then choose either a timed fee or an itemised fee. Enter the number of units; the rate will auto-populate based on the fee earner’s rate.
The narration will default to the selected activity, but you can modify it manually or choose from the available time item narration templates.
If the activity is non-billable, toggle off the Billable option. To save the activity as pending, toggle off the Finalise option at the bottom of the screen. Then click Save or Save and Close to record the time entry.

From Time Item + in the matter screen

2. On the Matter screen, you can either click on Time Item + or New Time Entry to create a time entry.

3. On the next screen, the matter number will populate automatically, as the time entry is being created from within the matter. Adjust the date if necessary, then select an activity from the drop-down menu — this will automatically populate the rate based on the fee earner.
Choose between a timed fee or an itemised fee, and enter the number of units in the Units field. If you'd like to change the default narration, you can manually enter a new one.
To mark the item as non-billable, toggle the Billable switch. To save the item as a pending time item (which you can edit later), toggle off the Finalise option at the bottom of the screen. Finally, click Save or Save and Close to save the time entry.
Edit Time Entry
If a time entry is saved as pending, it can be edited at any time. Alternatively, a finalised time entry can be unfinalised to allow for further edits.
Editing a pending Time Entry
1. Click on the three dots to the right of the pending time entry that you want to edit and click on View.

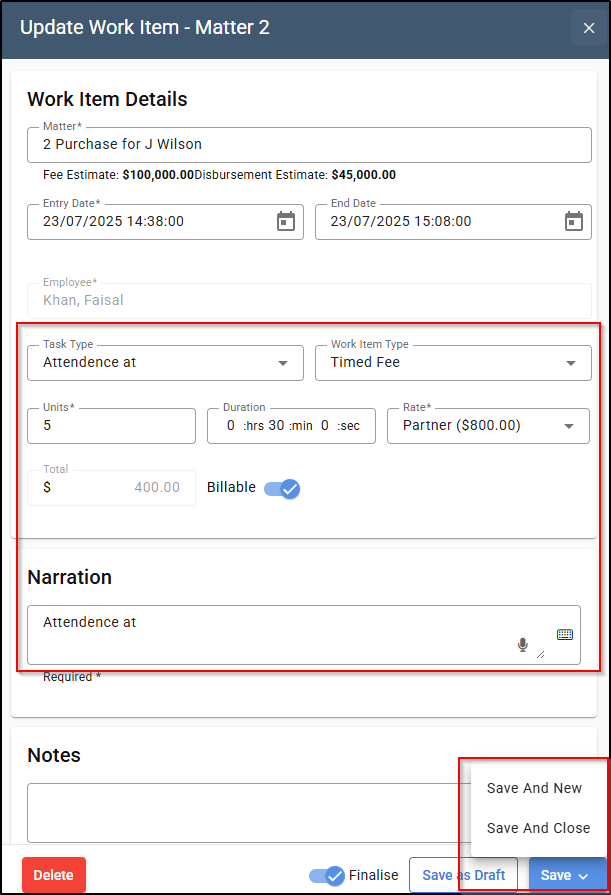
2. On the next screen, you can update the activity, time entry type, units, and narration. You can also mark the item as billable or non-billable by toggling the switch.
Once all changes are complete, use the toggle at the bottom of the screen to choose whether to save the item as pending or to finalise it. Then click Save and Save and Close to confirm your changes.
Editing a finalised Time Entry
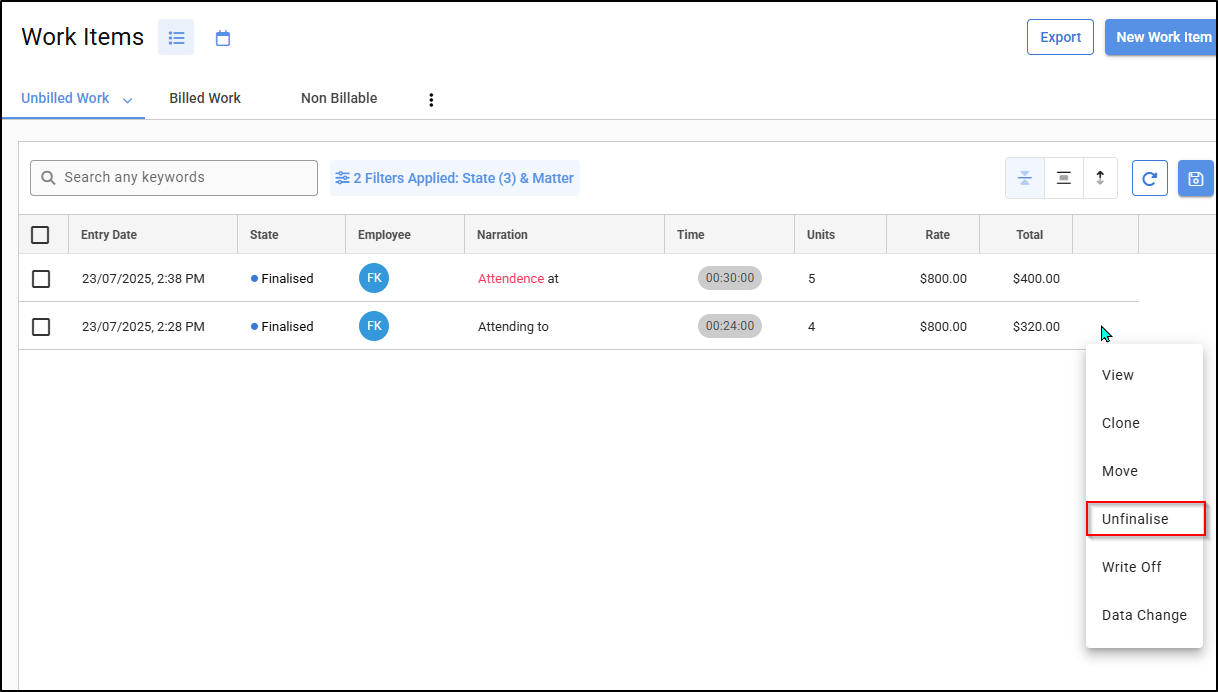
1. Click on the three dots on the right of a finalised time entry and select unfinalise.
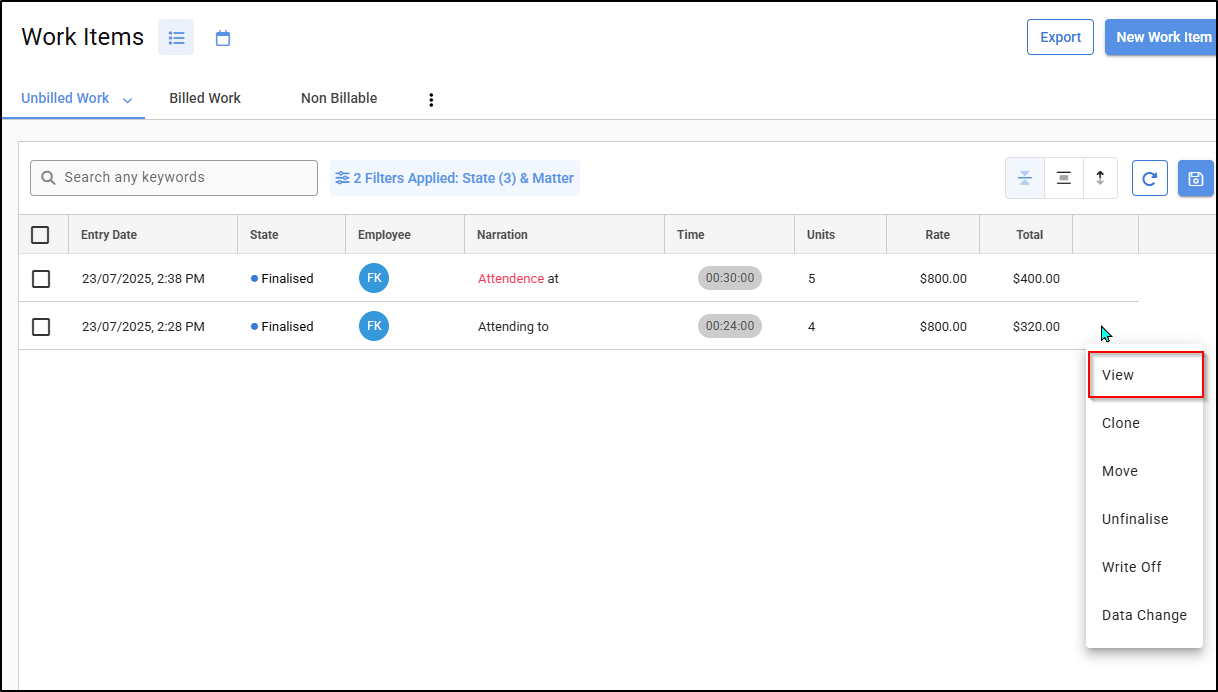
2. Once unfinalised, select View.
3. Make the changes required, then click on Save and Close.
Write Off a Time Entry
1. To write off a time entry, click on the three dots on the right of the time entry and click on Write Off.
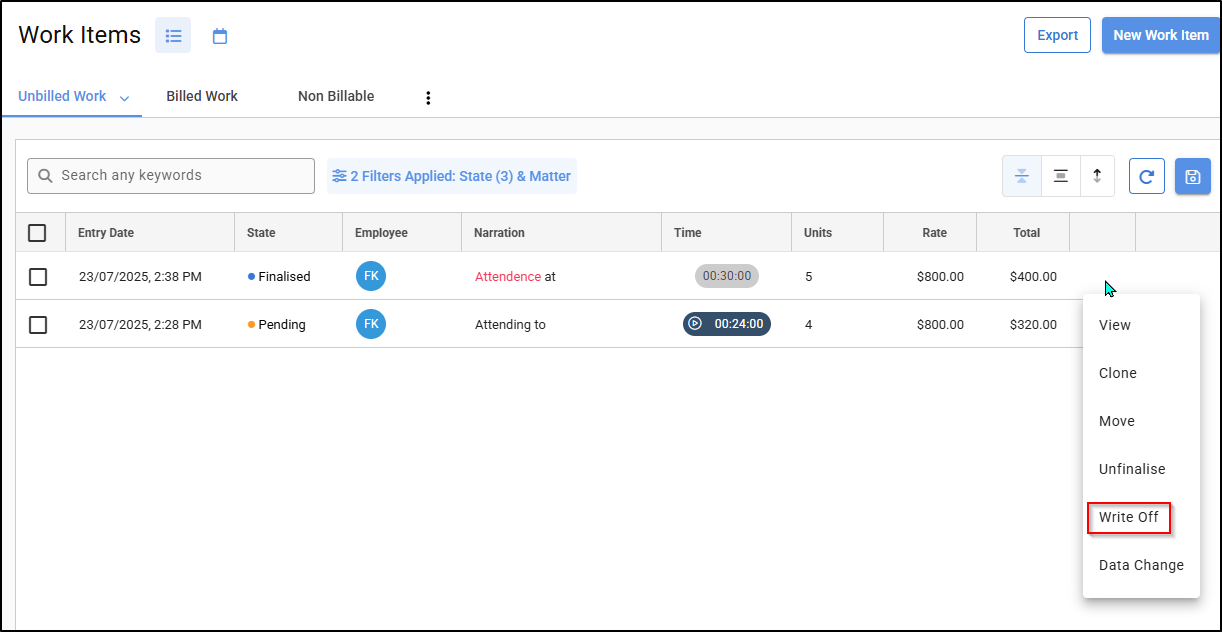
2. In the next screen, type in a date and select Write Off.

3. The time entry will be written off.

( Example of Writing off: Time entry dated 26/08/2024 is written of on the 17/10/2024. If the Period Date in Firm Settings is set as 01/09/2024 and the user runs a matter balance report as at 30/09/24, the time entry will be shown as written of, even though it was not written off until 17/10/24).